Build A Digg Clone With Drigg For Drupal – Part 2 Installing And Configuring Drupal And Drigg
Due to several work related issues it has taken longer than expected for me to publish this second part in our “Build A Digg Clone With Drigg For Drupal” tutorial, but the wait is over as this is the second part you are now reading ![]() . Here in Part two we are going to go through the process of installing Drupal and the Drigg related modules along with all the configuration setting you will need to set for the system to operate as it should. We always think Pictures can be better than words for new users to any system so this tutorial will have screen shots of each step as we go, so lets begin.
. Here in Part two we are going to go through the process of installing Drupal and the Drigg related modules along with all the configuration setting you will need to set for the system to operate as it should. We always think Pictures can be better than words for new users to any system so this tutorial will have screen shots of each step as we go, so lets begin.
First of all you should now have all the modules we directed you to in part one of this tutorial set here “Build A Digg Clone With Drigg For Drupal – Part 1 What You Will Need“.
Installing The Drupal Core
We are going to take it that anyone performing this tutorial will already have elements of their site like a domain name and ftp configured.
The first task is to create a mysql database titled whatever you like, we will call ours driggtutorial for example purposes throughout this article. You can create a new database in your web hosting control panel usually with phpMyadmin or a utility similar.
Login to you FTP and upload the contents of the Drupal 5 package to your sever, when the drupal files have all been uploaded it’s now time to visit your domain name to access the drupal installer.
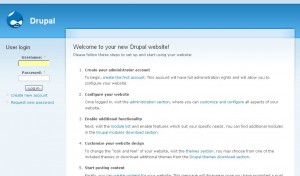
Fill in the fields in the Drupal installer page.
Database Name = the name if the myswl database you created.
Database Username = The username used to access your created database.
Database Password = The password for your created database.
Now click Advanced Options, the only part you may need to change here depending on your hosting enviroment is Database Host.
Click Save Configuration and Drupal should now be installed.
The next screen you will see confirms this and has a link to take you to your freshly installed Drupal site. Goto your site straight away as you are required to create the first user which will have God status over the whole system, it’s very important that you do this task straight after install otherwise a lucky visitor just might beat you to it and you would have to reinstall again.
Now you have created you account login to your drupal site and we can begin some basic configuration and eventually install the Drigg modules which is the real reason your reading this article in the first place ![]()
I want to begin with setting some clean urls as it’s easier then to follow my example urls that will be included throughout the tutorial, so lets do that first. Visit the url below in your drupal panel then “Run the clean URL test” and if successful set to enabled and save configuration.
hxxp://yourdomain/?q=admin/settings/clean-urls
Now visit the URL below.
hxxp://yourdomain/admin/logs/status
This will tell you two things the first of which is that cron has not been run so cron manually now, secondly it says that the directory /files is missing. Goto your FTP and create the directory /files in your root drupal install folder you will need also to chmod the folder permissions to 777.
Next and basically last to setup drupal is your site information Name, Description, email etc goto the url below and fill in those details.
hxxp://yourdomain/admin/settings/site-information
Now we are ready to start installing Drigg and it’s related modules so goto page 2 ![]()
If you enjoyed this post, make sure you subscribe to our RSS feed!


Great article Lincoln. Have you thought of doing any themes for Drigg?